By default, after you install any of our themes, you’re gonna see that it shows the logo of the theme itself. Most likely you don’t want to use that, and prefer to have your own logo or the name of your site instead. So here’s how you can change the default logo and use your own.
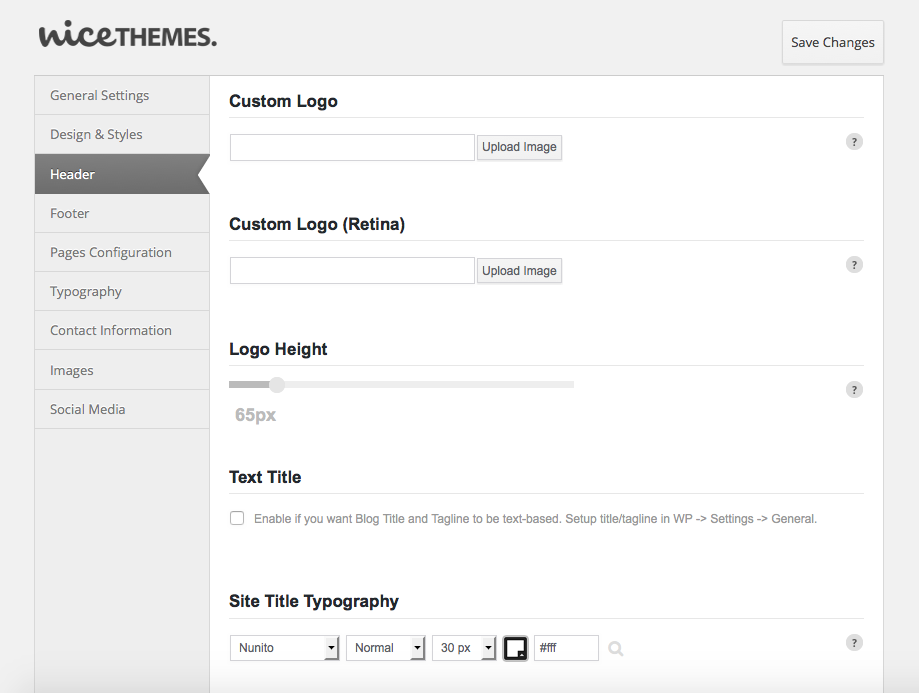
- Go to NiceThemes > Theme Options > Header. There you’re gonna see the following options:

- Click the “Upload image” button right below “Custom Logo” and upload any image you want, or use an existing one.
- Additionally, you can repeat step 2 for “Custom Logo (Retina)”, to upload an image that will be loaded instead of the first logo you selected when your site is viewed from a device with a retina display. Keep in mind that retina images are often the same as the originals, but double in size (for example, if the dimensions of your custom logo are 200×40 pixels, the ideal dimensions for your retina logo will be 400×80 pixels).
- Click “Save Changes”. Now you should see your custom logo in the front-end area of your site.
In case you don’t want to use an image for your logo and prefer to just display the name of your site in plain text, you can do so by checking the “Text Title” option. You can set the typography, font style, size and color for your site title by tweaking the settings under “Site Title Typography”.

